Wooting 80HE Quickstart
Guide
Hey! Nice to meet you
This guide helps you get started with the Wooting 80HE. Make sure to read the text and not skip too many things. You'll thank us later.
Glory is only as sweet as the people that are there to witness it. So share your experience, enjoyment or frustration with the Wooting community (and the Wooting team) on Discord. We’d also love to see how the 80HE looks on your desk, so don’t shy away from tweeting us a sweet picture on X and don’t forget to tag @wootingkb.
What's inside the box
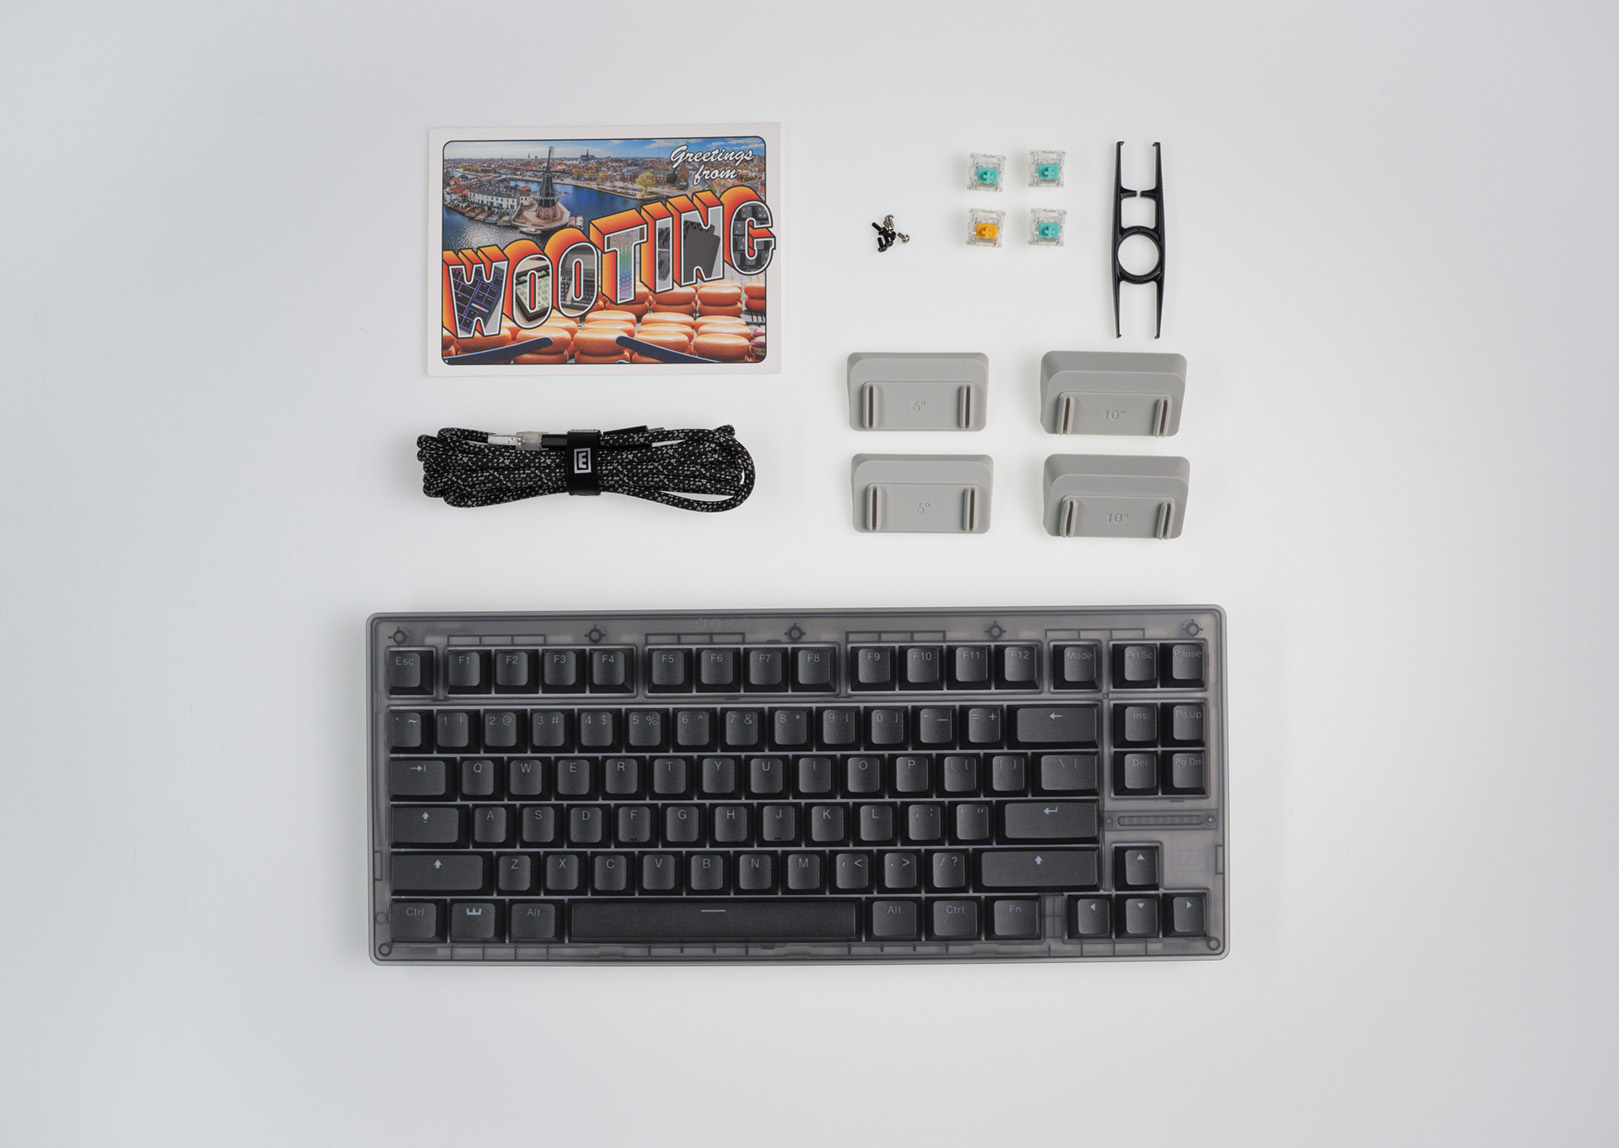
- 1x Wooting 80HE
- 1x USB-C cable (incl. USB-A Dongle)
- 1x Keycap & Switch Püller
- 1x Postcard
- 3x Spare L60 Lekker V2 Switch
- 1x Spare L45 Lekker V2 Switch
- 7x Spare screws
- 2 Silicone Feet 2.8°
- 2 Silicone Feet 6°
- 2 Silicone Feet 10°
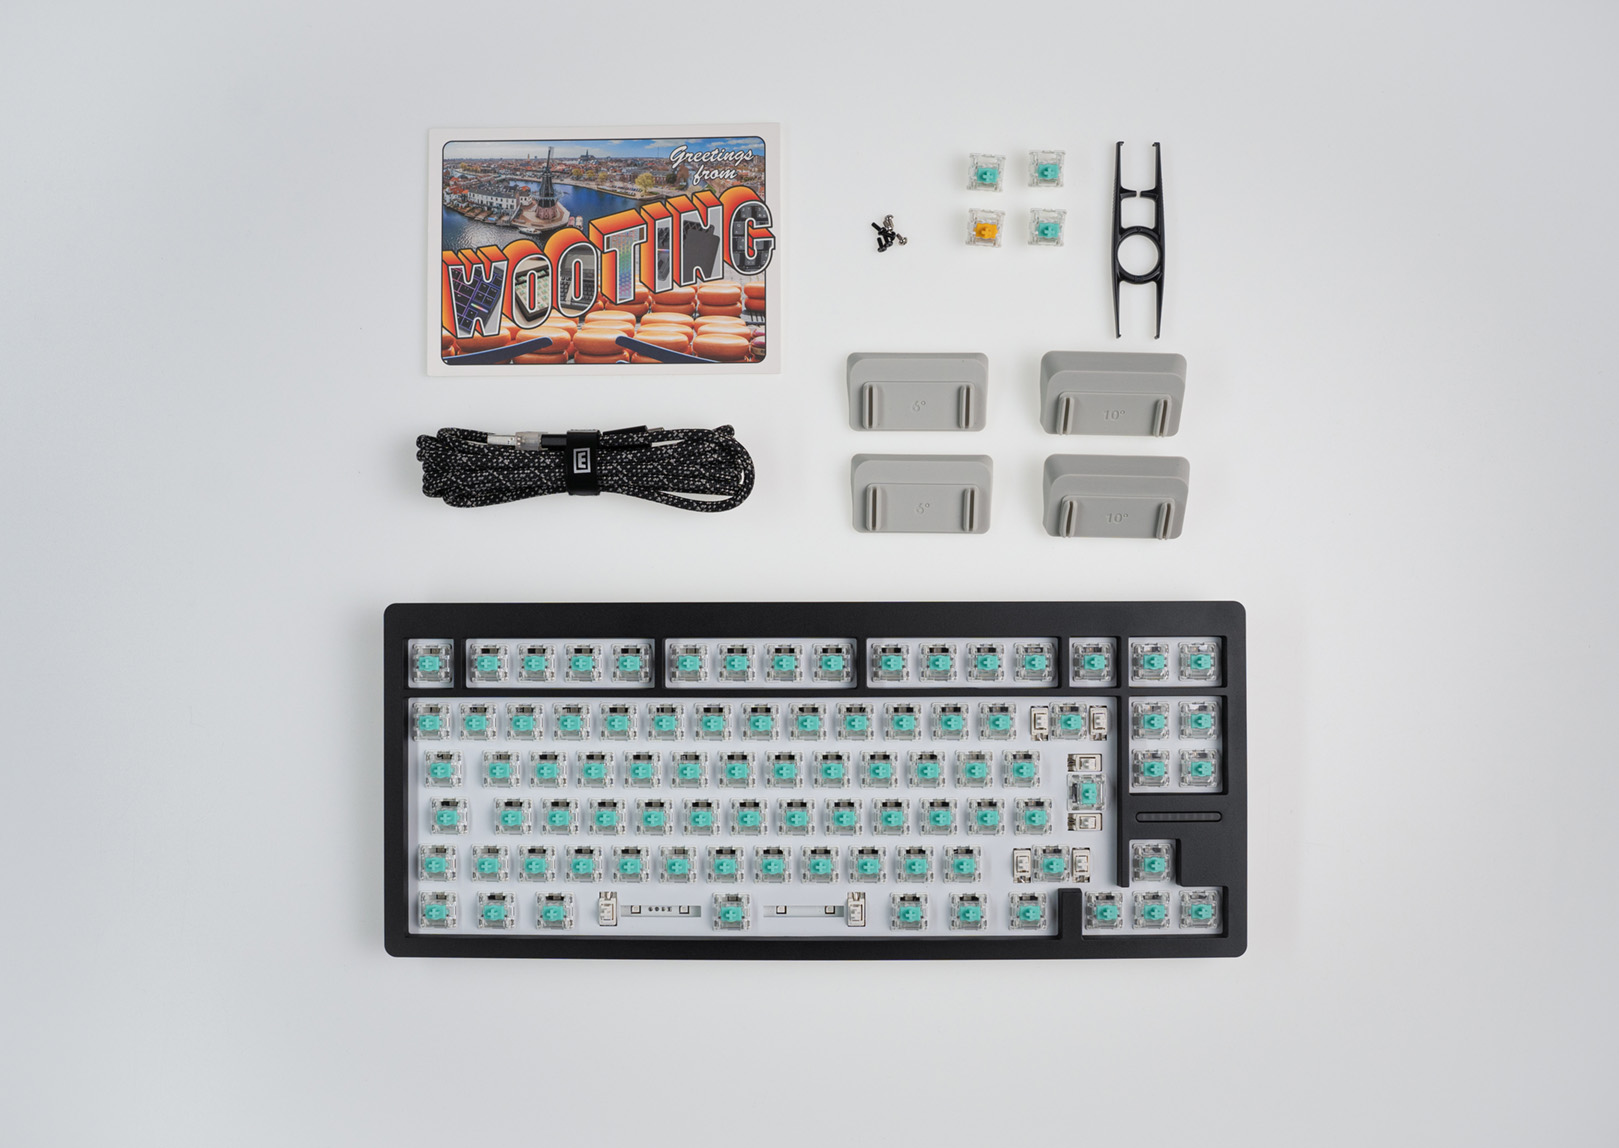
- 1x Wooting 80HE
- 1x USB-C cable (incl. USB-A Dongle)
- 1x Keycap & Switch Püller
- 1x Postcard
- 3x Spare L60 Lekker V2 Switch
- 1x Spare L45 Lekker V2 Switch
- 7x Spare screws
- 2 Silicone Feet 2.8°
- 2 Silicone Feet 6°
- 2 Silicone Feet 10°
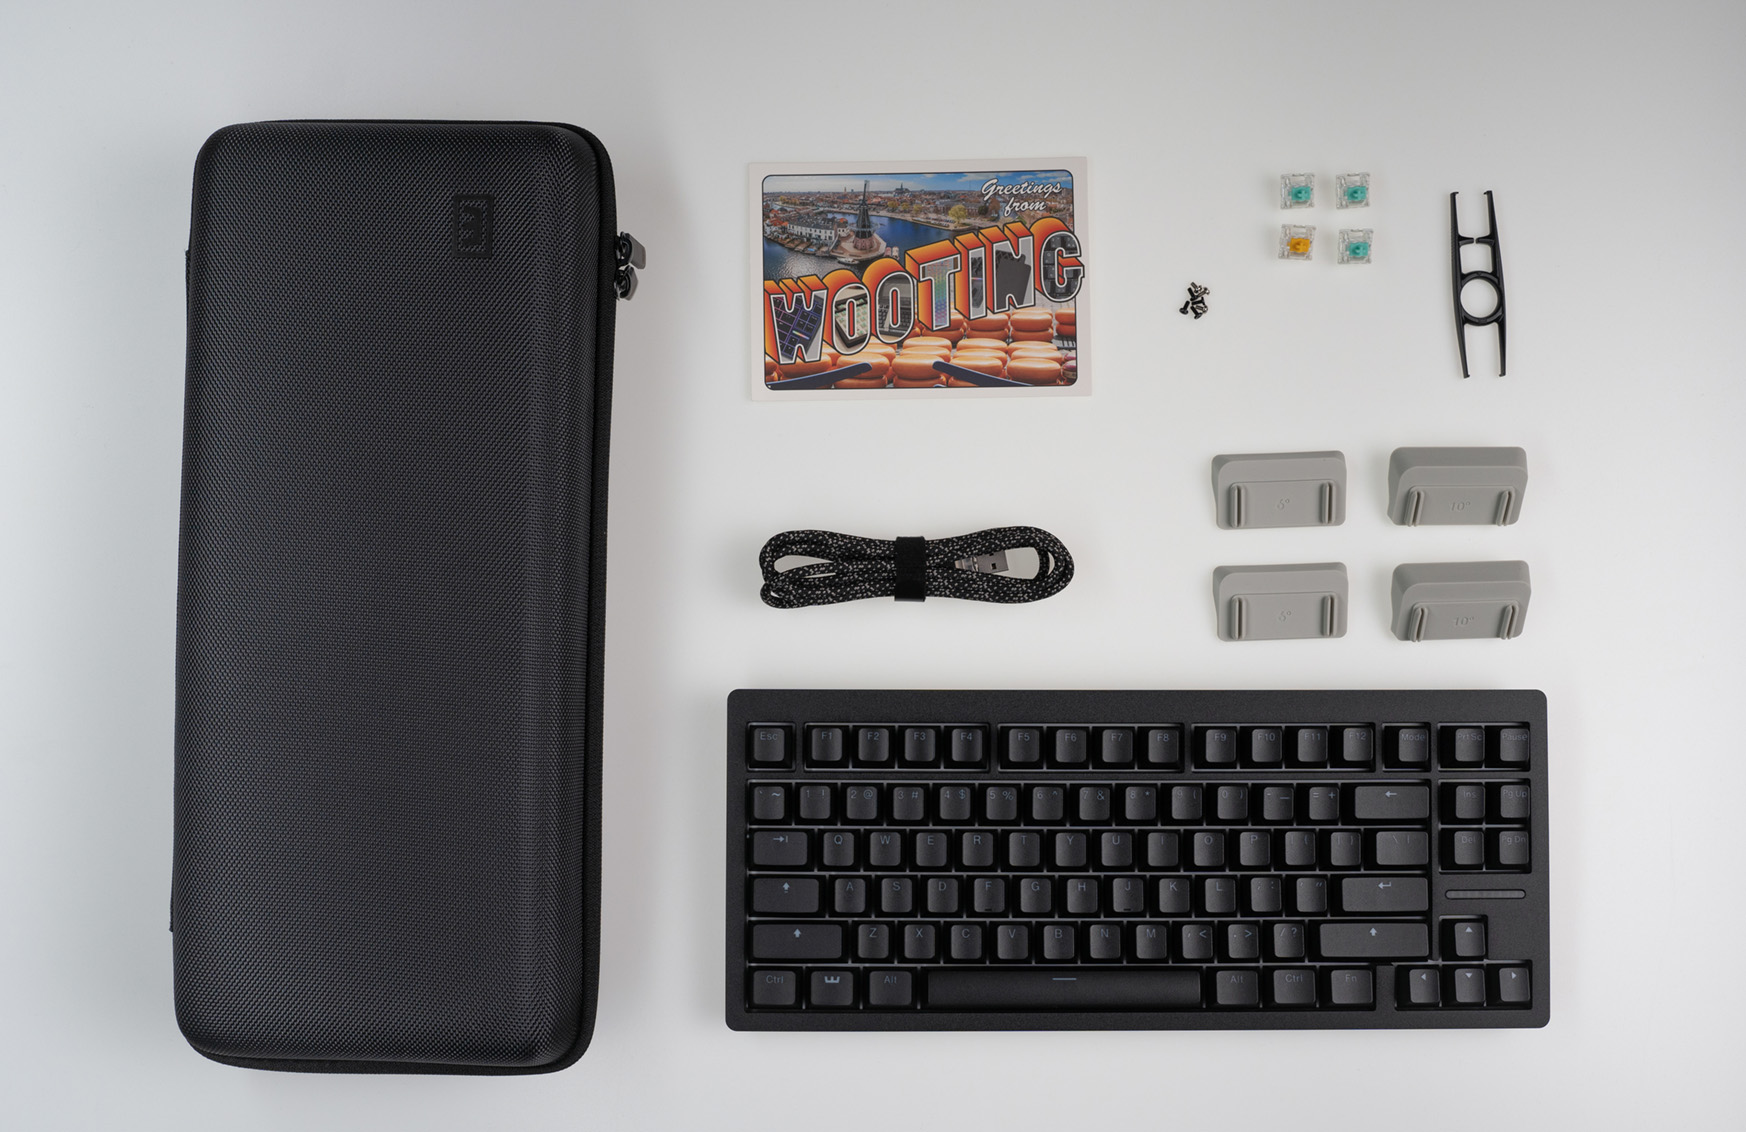
- 1x Wooting 80HE
- 1x USB-C cable (incl. USB-A Dongle)
- 1x Keycap & Switch Püller
- 1x Wooting Travel Case 80HE
- 3x Spare L60 Lekker V2 Switch
- 1x Spare L45 Lekker V2 Switch
- 7x Spare screws
- 1x Postcard
- 2 Silicone Feet 2.8°
- 2 Silicone Feet 6°
- 2 Silicone Feet 10°
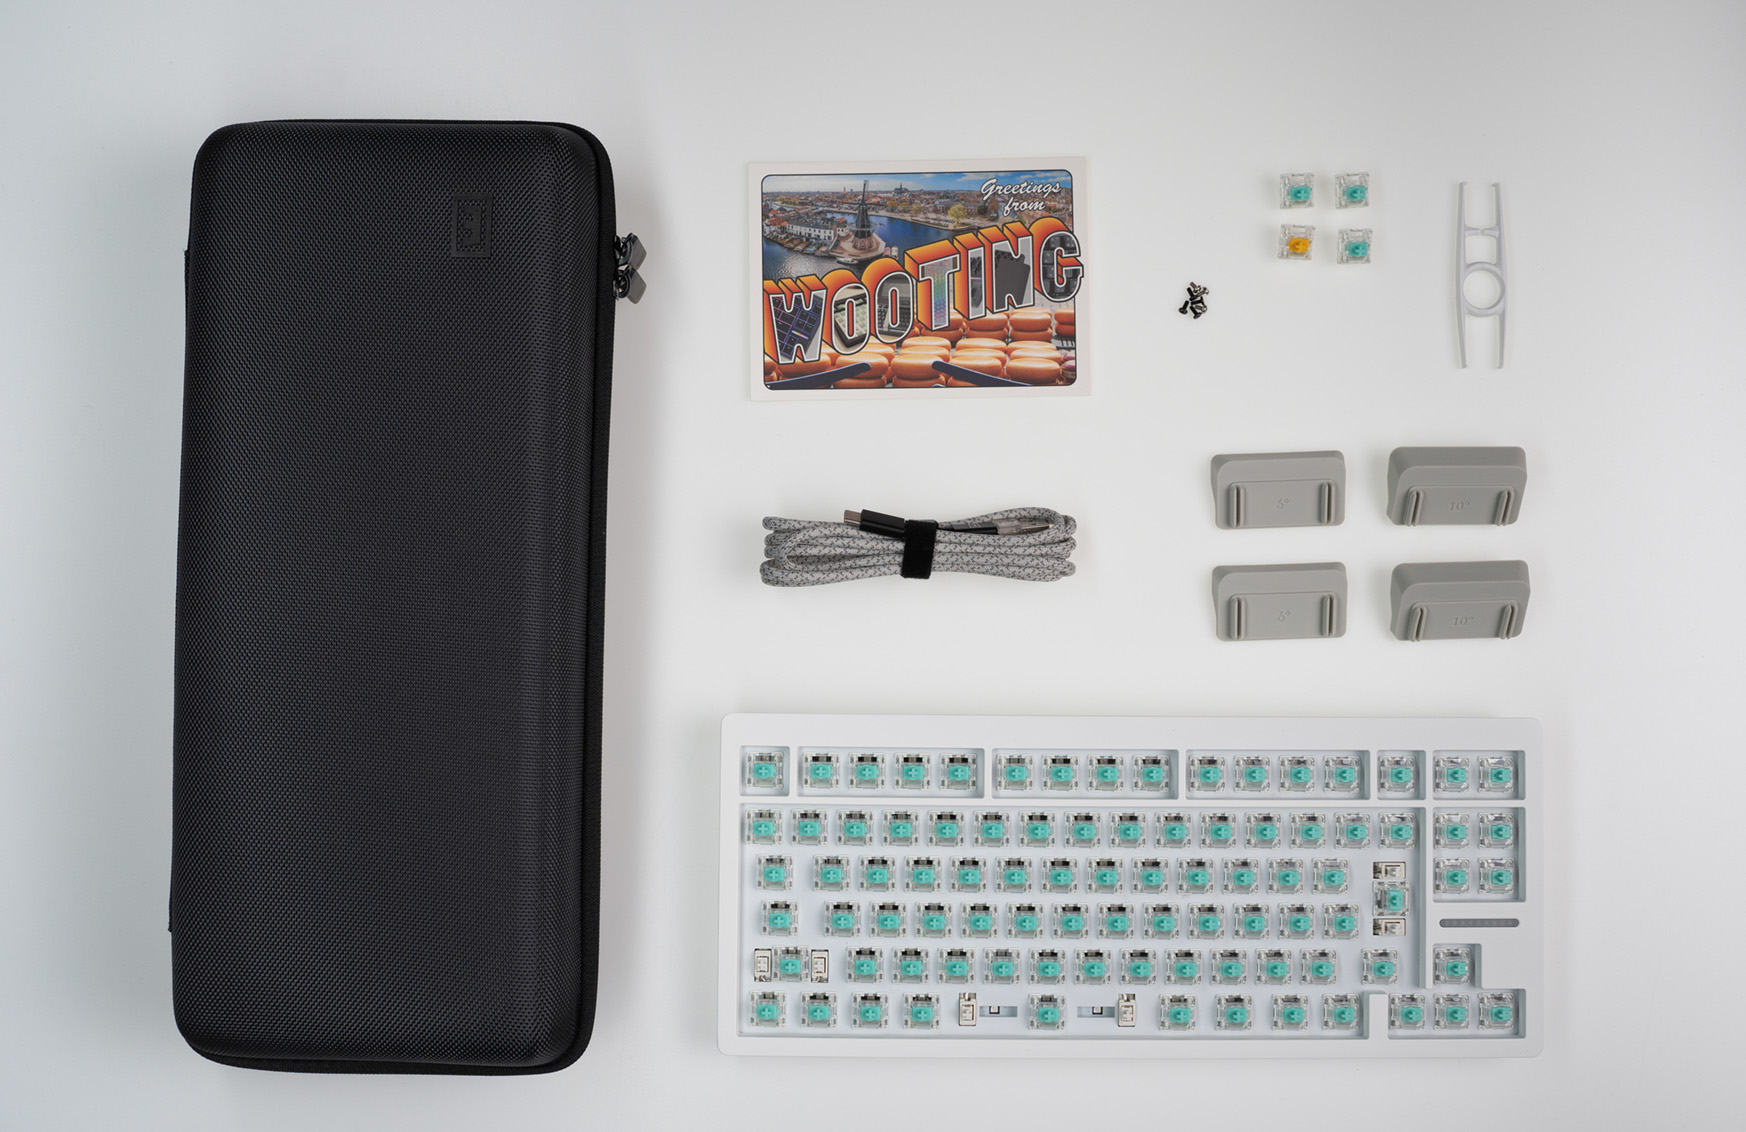
- 1x Wooting 80HE
- 1x USB-C cable (incl. USB-A Dongle)
- 1x Keycap & Switch Püller
- 1x Wooting Travel Case 80HE
- 3x Spare L60 Lekker V2 Switch
- 1x Spare L45 Lekker V2 Switch
- 7x Spare screws
- 1x Postcard
- 2 Silicone Feet 2.8°
- 2 Silicone Feet 6°
- 2 Silicone Feet 10°
Installing keycaps
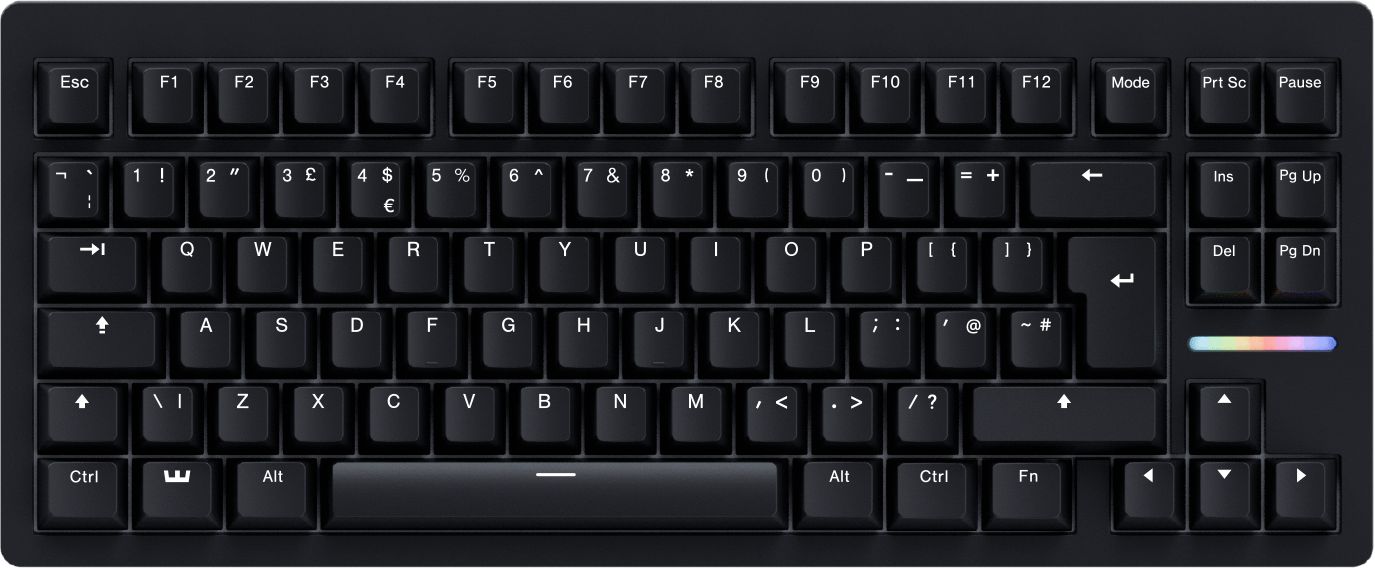
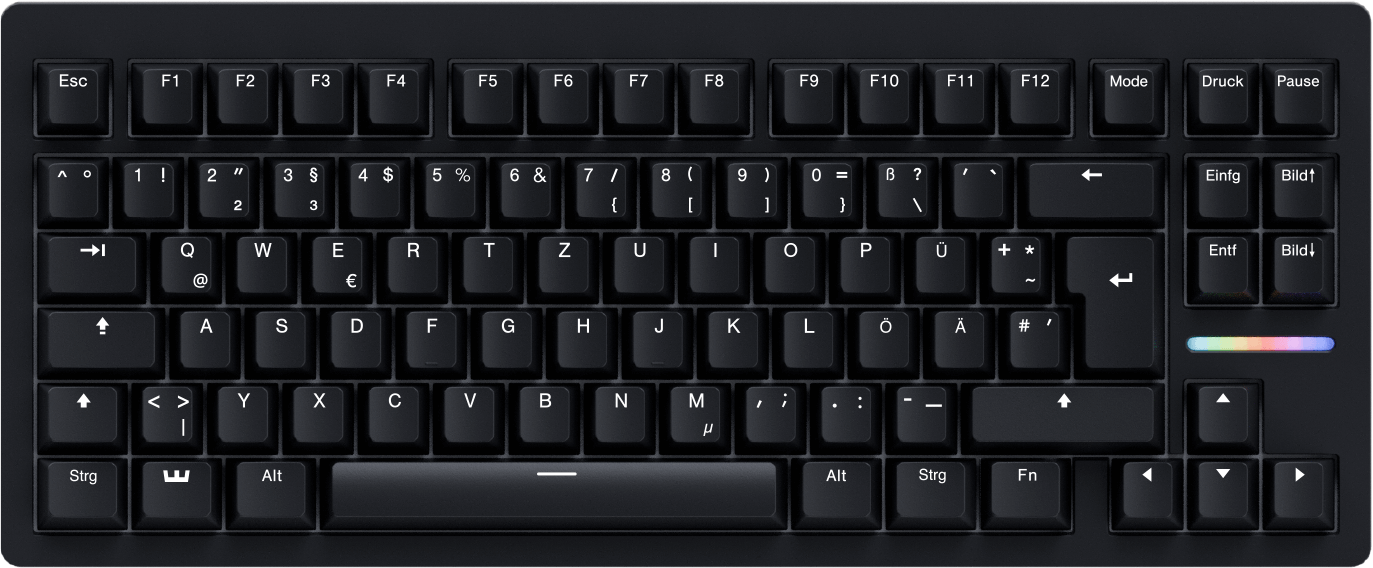
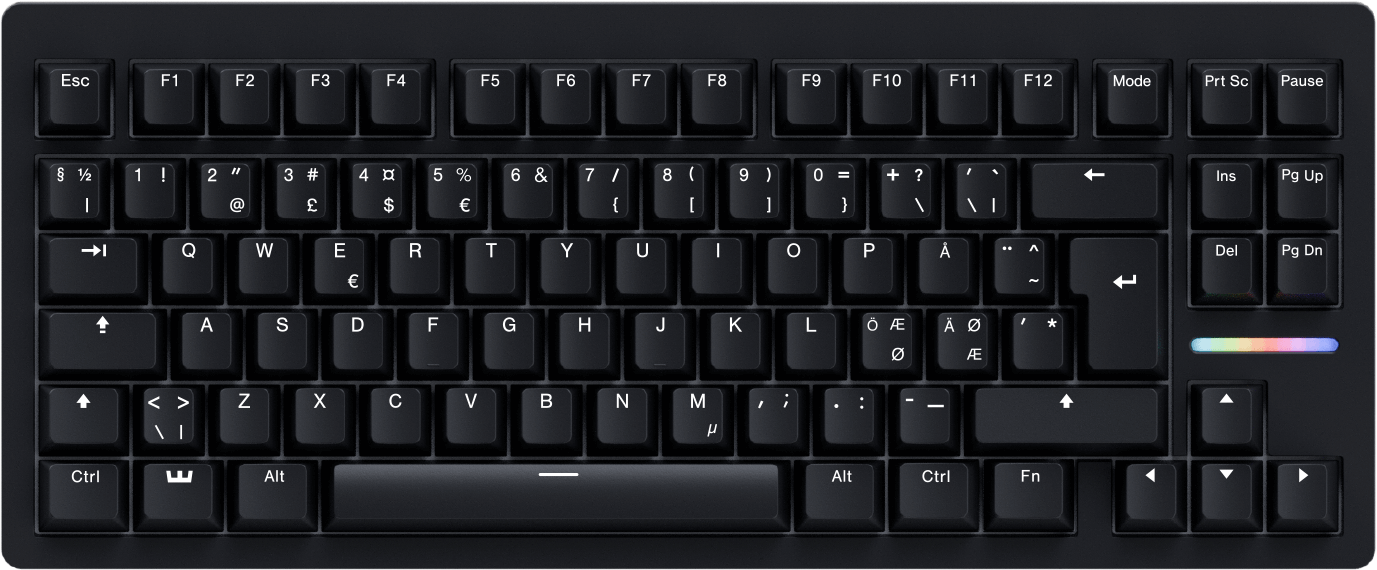
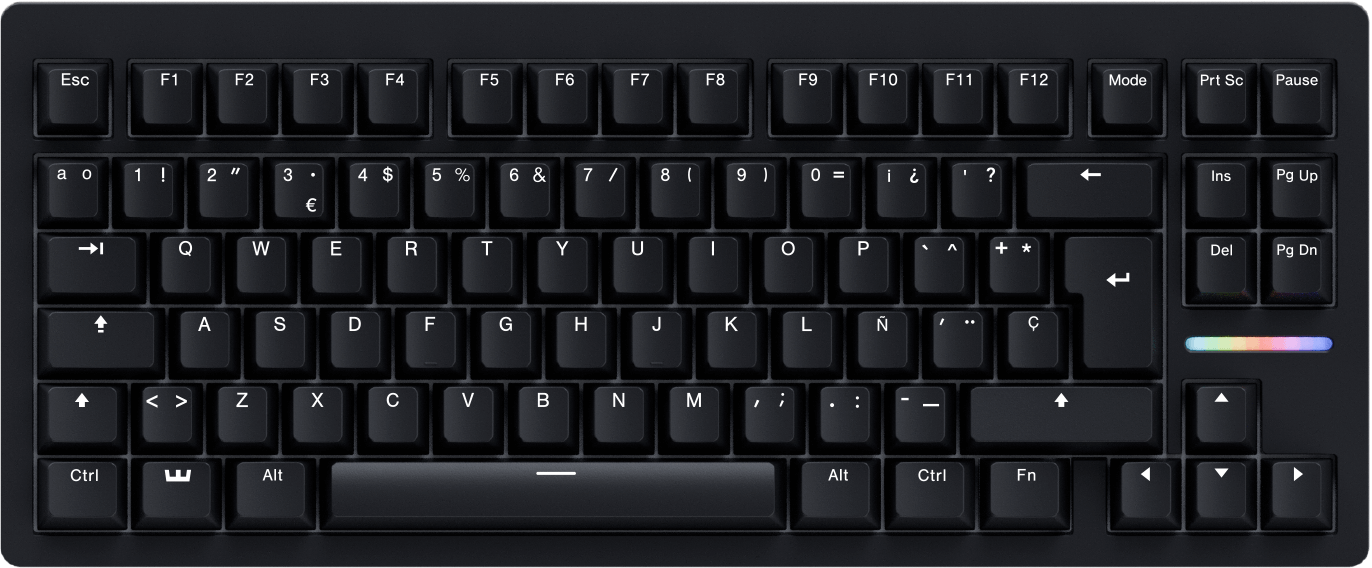
The Wooting 80HE ISO models don’t have keycaps pre-installed. Don’t worry, installing keycaps is easy and it’s a great way to bond with your keyboard <3.
When installing a keycap, make sure to press the keycap down firmly so it tightly fits the switch.
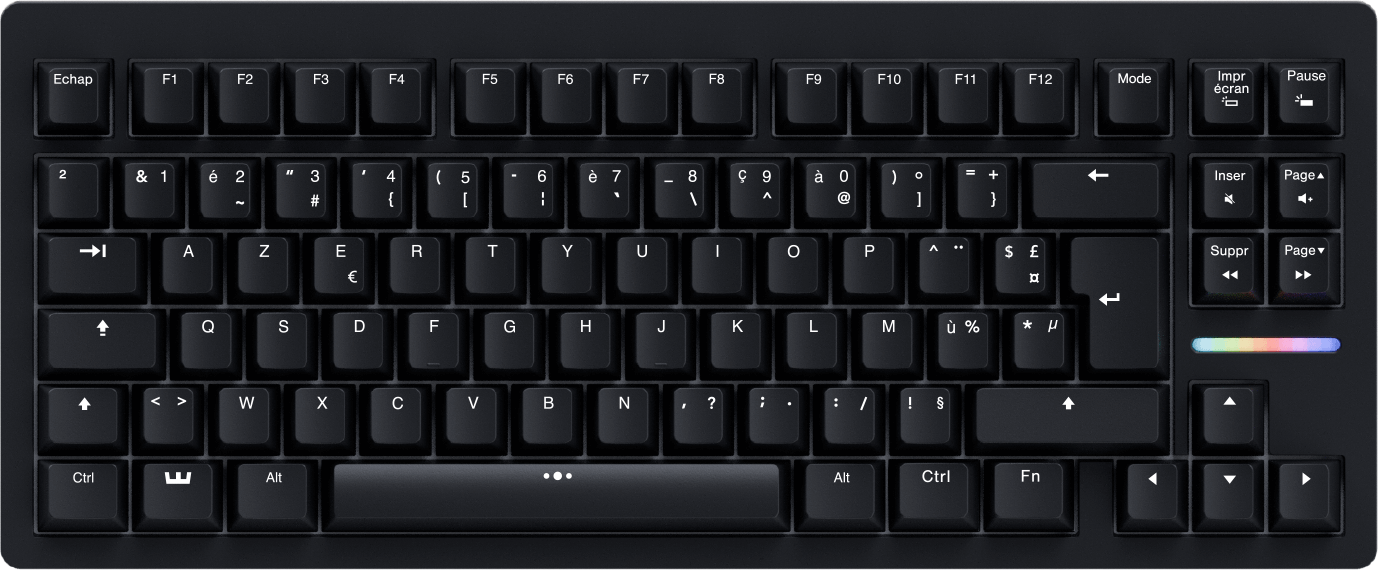
Below is a visual representation of the 80HE that shows different keyboard lay-outs and languages, just in case you’re not sure about which keycap goes where.
Pulling keycaps
Want to install a new keycap set? Time to master the art of keycap pulling.
Your 80HE came with our new ‘keycap & switch püller’, a tool that functions both as a keycap- and switch puller. Make sure to use the side that says "keycap" and follow the instructions below.
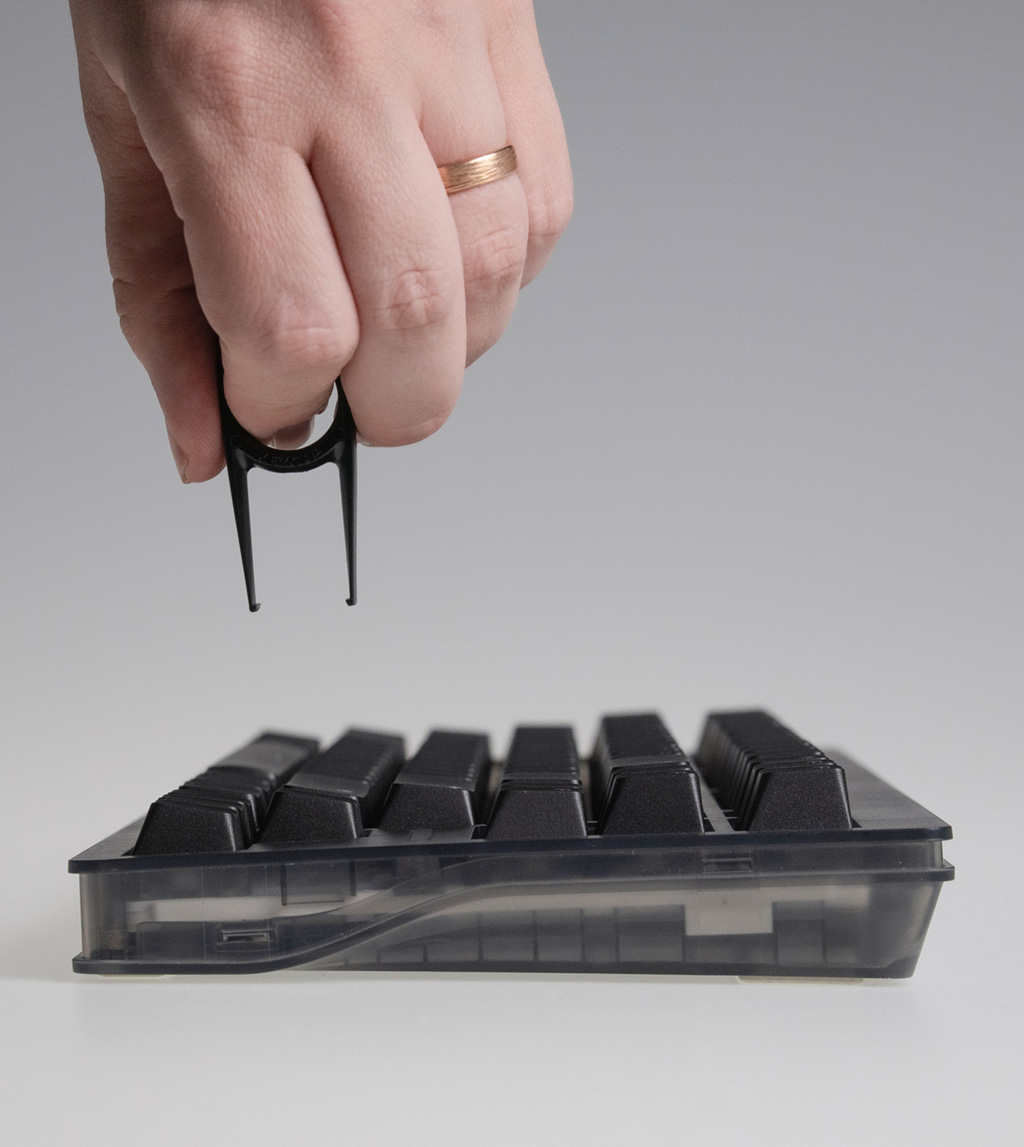
1. Push
Align the püller over the keycap and push down. Make sure it *clicks* on both sides.

2. Pull
Pull with one hand straight up. With your other hand hold down the keyboard.

3. Pop
Pop goes the weasel.
Pulling switches
Want to swap out a switch? Grab the ‘keycap & switch püller’ that came with your 80HE and follow the instructions below. This time, use the side that says “switch”.
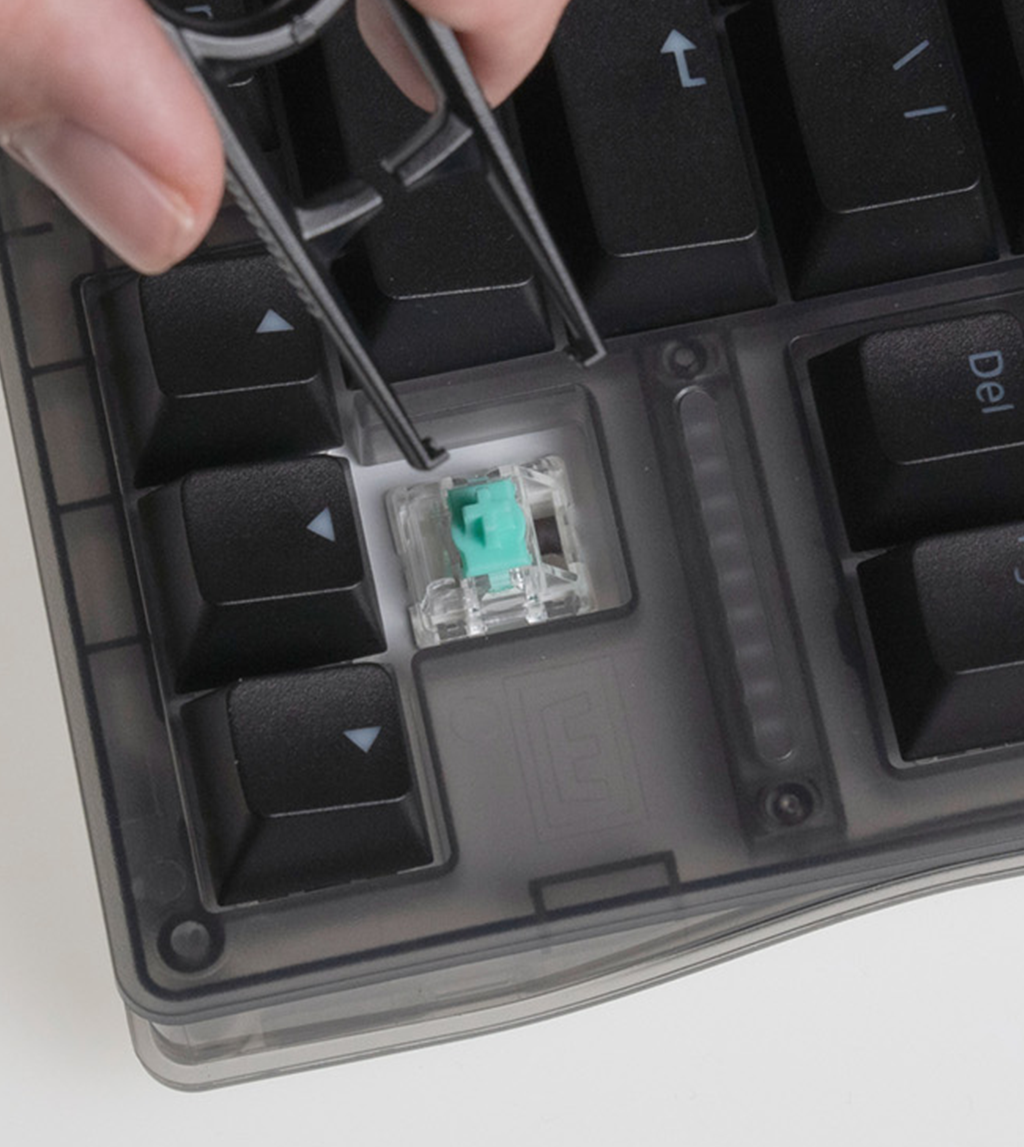
1. Grip
Carefully grip the north (top) and south (bottom) sides of the switch.
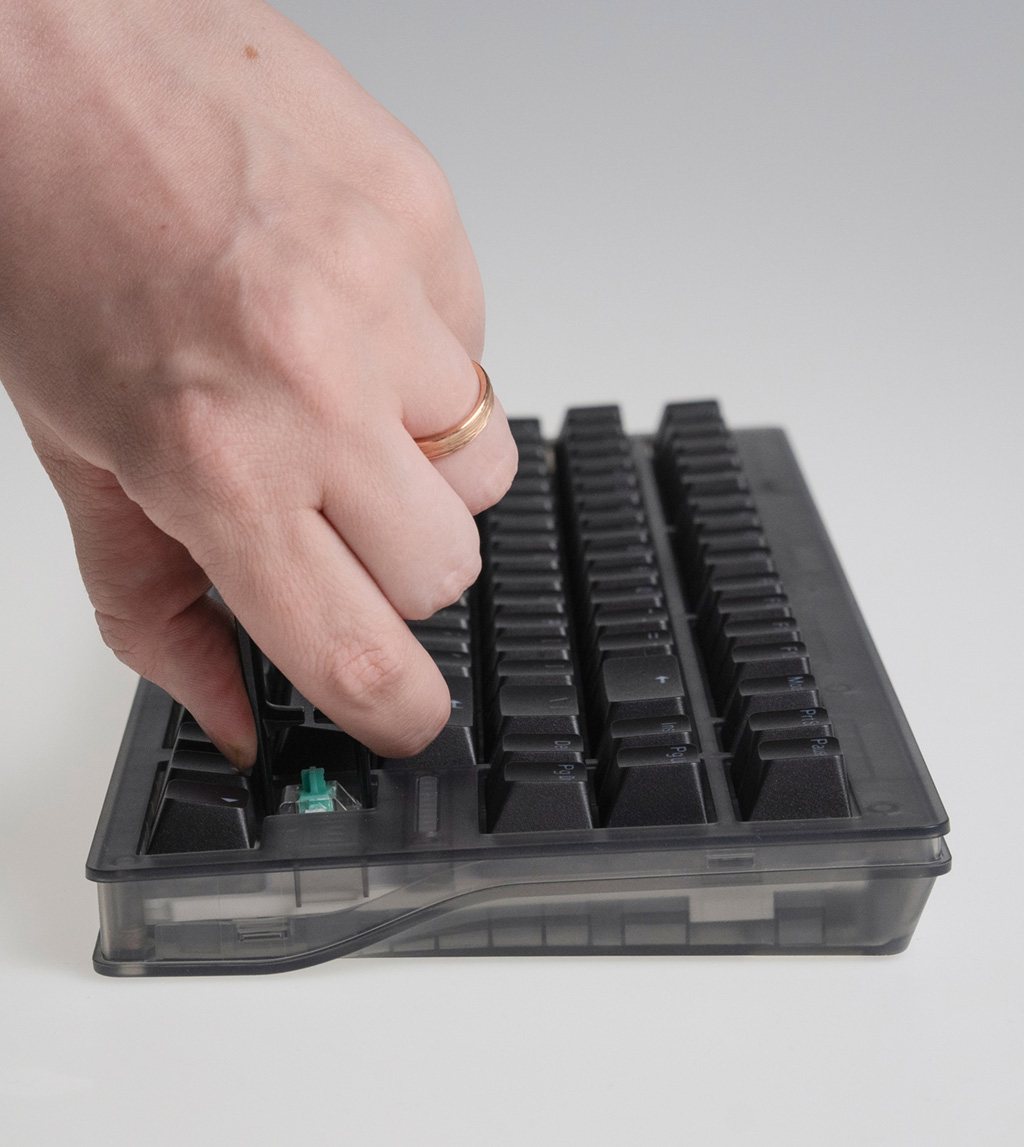
2. Squeeze
Gently squeeze and wiggle to detach both sides.
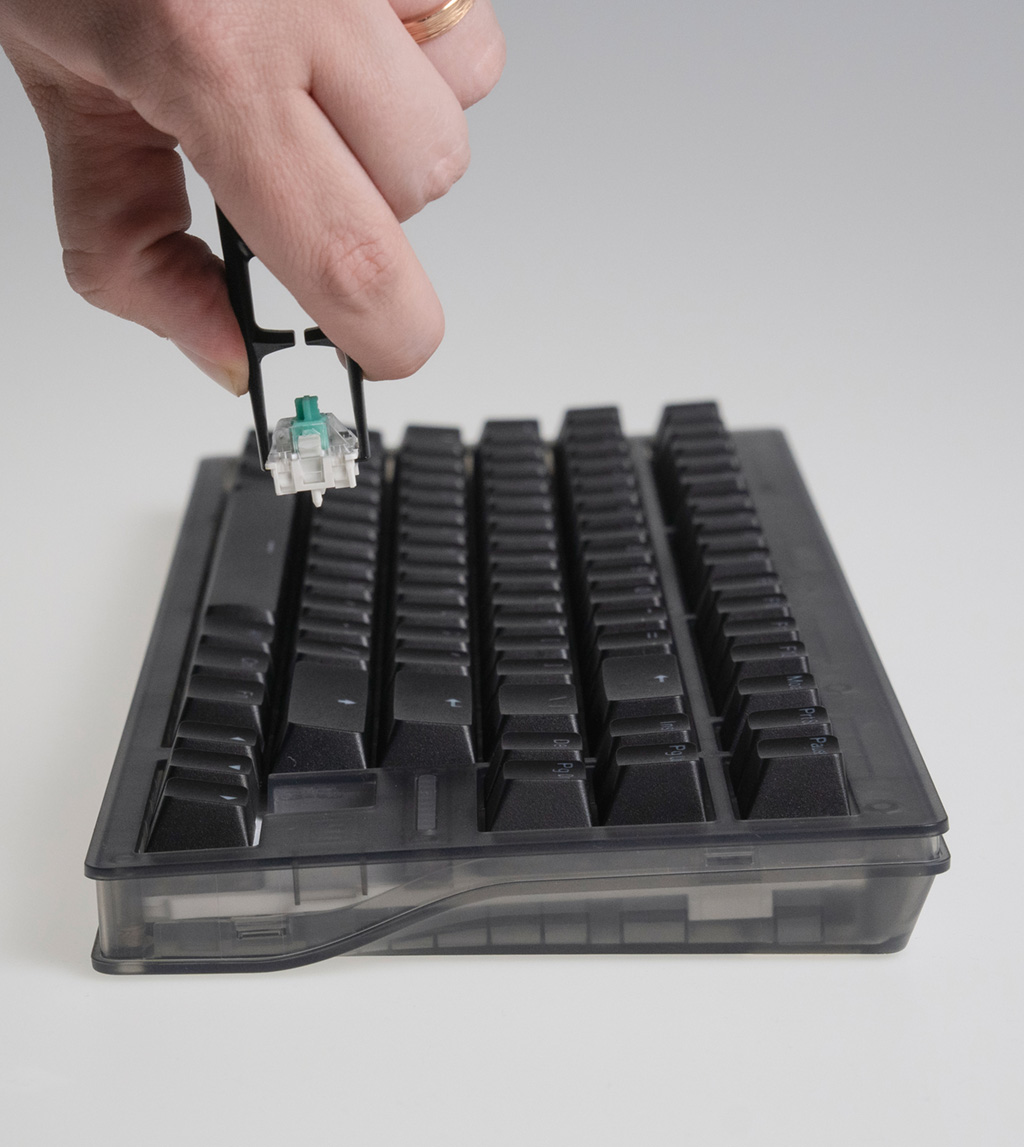
3. Lift
Once detached, lift the switch out of the socket.
Swapping your case
So you just got your new 80HE but want to swap your case for one of these shiny zinc alloy ones? Sander will talk you through it step by step, he even shares some pro-tips in between.

Keyboard modes & shortcuts
Your 80HE has an extra layer that can be accessed by pressing the FN key.
Getting familiar with these shortcuts saves you time and effort. The visual below shows you the default shortcuts. Use them to quickly switch Wootility profiles, access media controls or adjust the brightness LED lighting.
Don’t like the shortcuts we came up with? Simply add, remove or change shortcuts on the ‘Remapping’ tab in the Wootility.
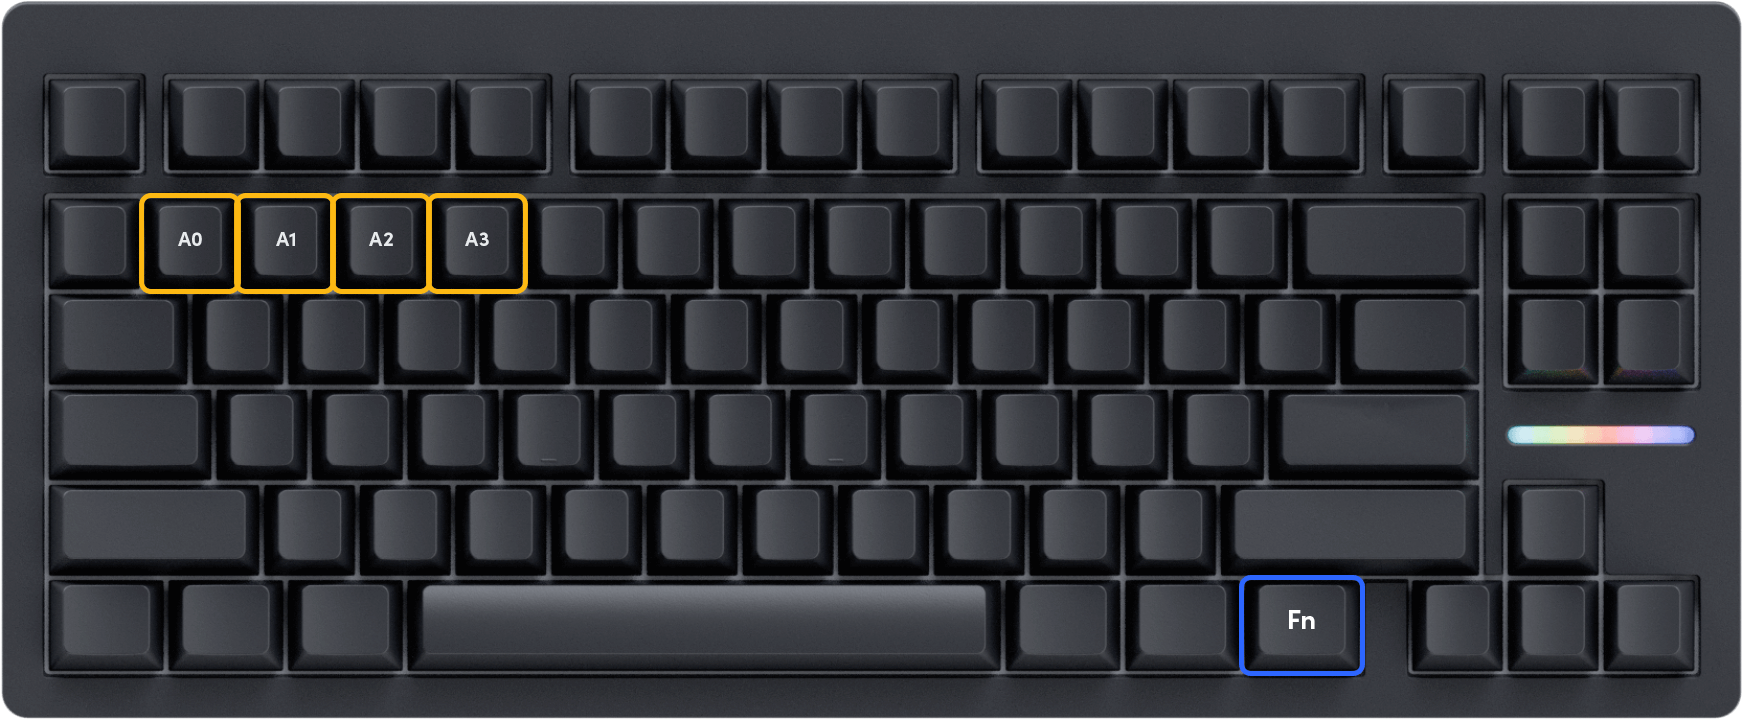
You can save up to 4 Wootility profiles to your keyboard and quickly switch between profiles without opening the Wootility. Just hold the FN key while pressing A0, A1, A2 or A3 (see visual below). These shortcuts make it easy to test out different settings in-game or switch between work- and leisure mode.
To access the mode key first hold down FN key then press 1, 2, 3 or 4.
Out of the box, the keyboard defaults to only A0 and A1, [FN+1] and [FN+2] respectively.
*Regardless of the language layout, the location is the same. Text is based on ANSI US English.
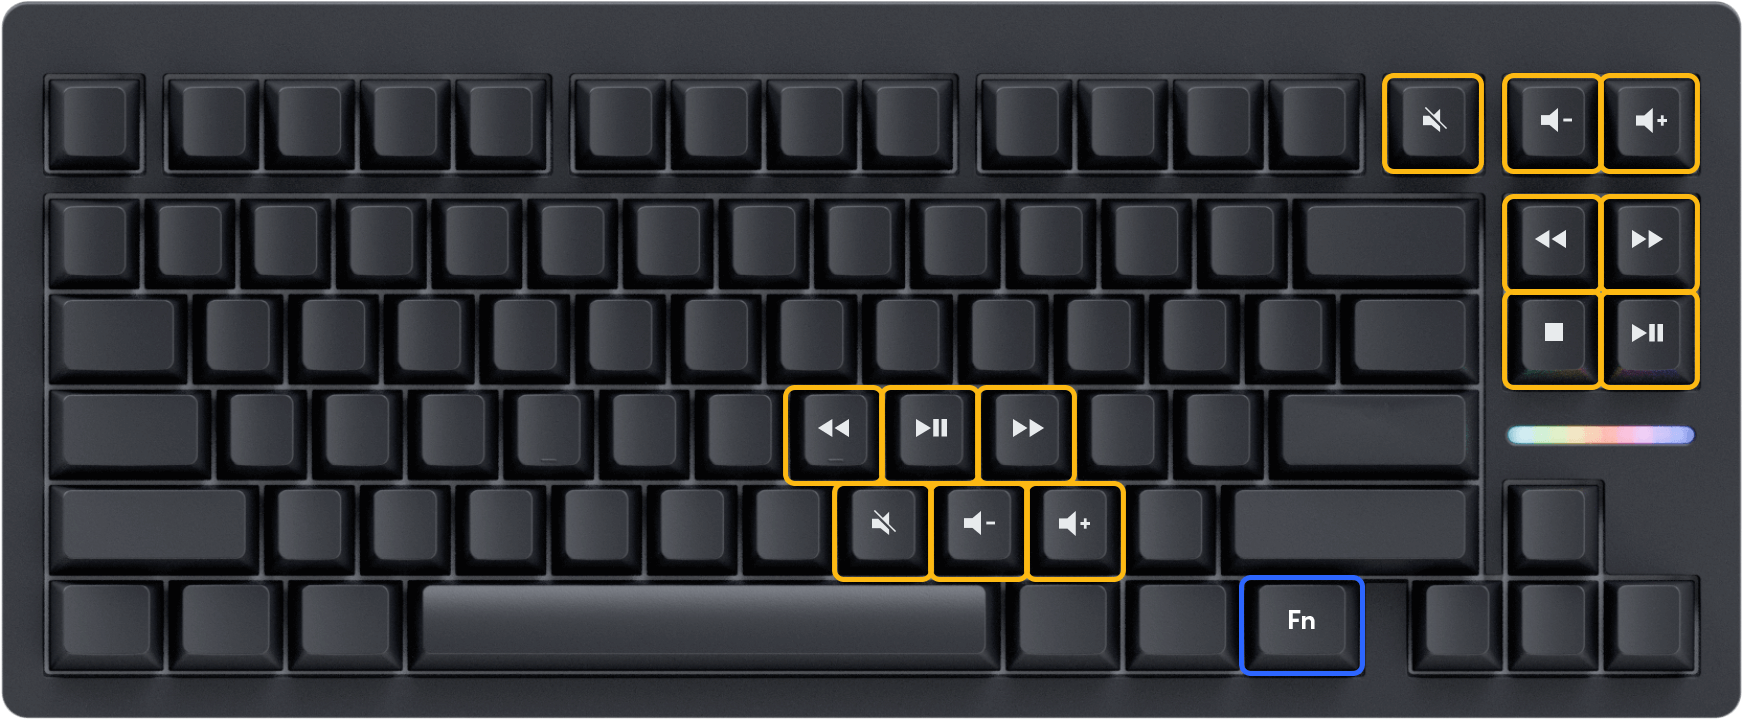
To access various media keys use the following key combinations:
Previous track hold down FN key then press J
Play/pause hold down FN key then press K
Next track hold down FN key then press L
Mute sound hold down FN key then press M
Lower volume hold down FN key then press ,<
Increase volume hold down FN key then press .>
*Regardless of the language layout, the location is the same. Text is based on ANSI US English.
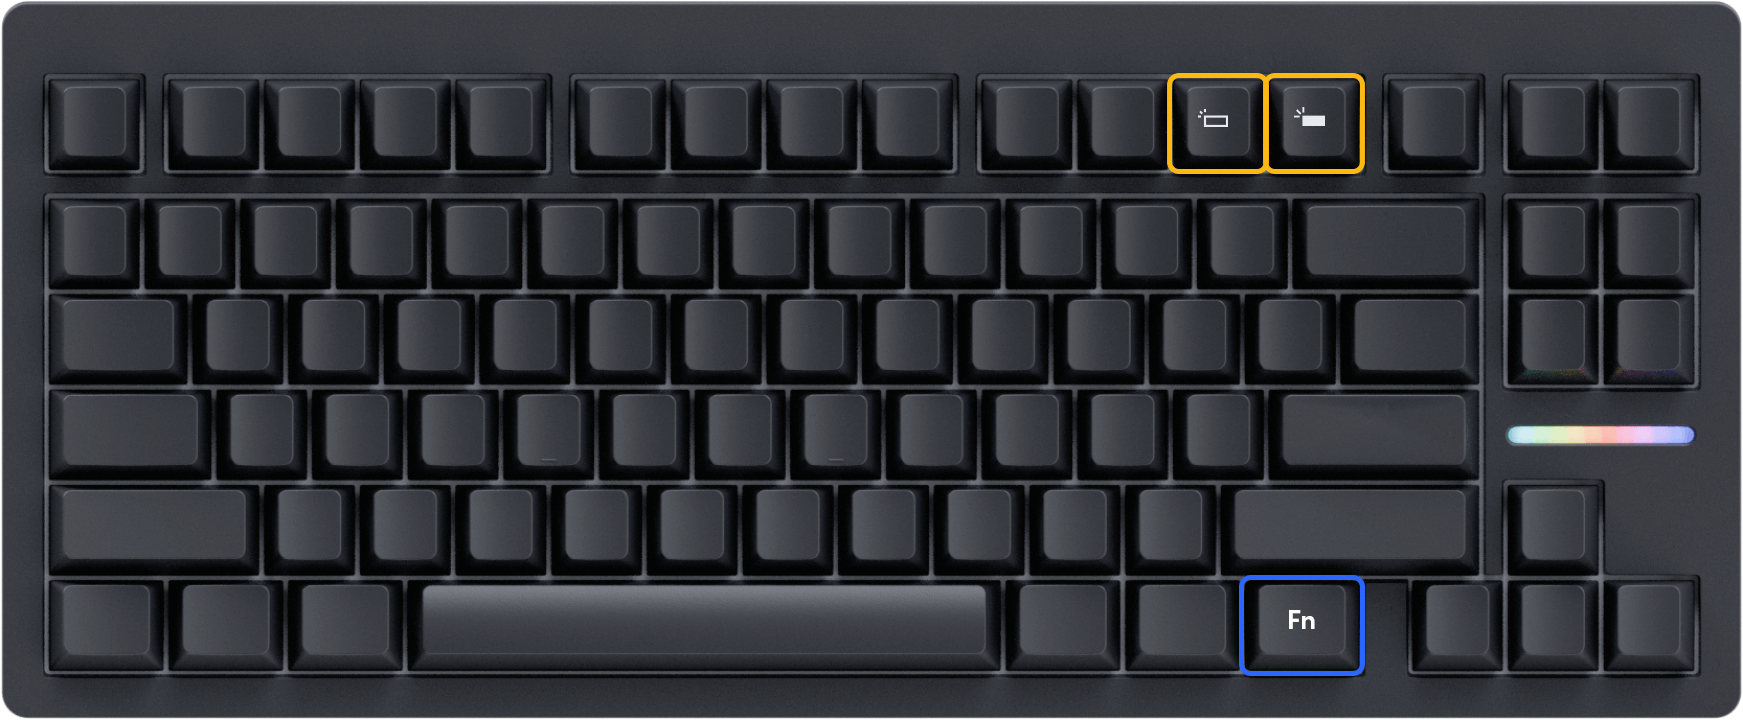
To adjust the LED brightness on the fly:
Lower brightness hold down FN key then press F11
Increase brightness hold down FN key then press F12
*Regardless of the language layout, the location is the same. Text is based on ANSI US English.
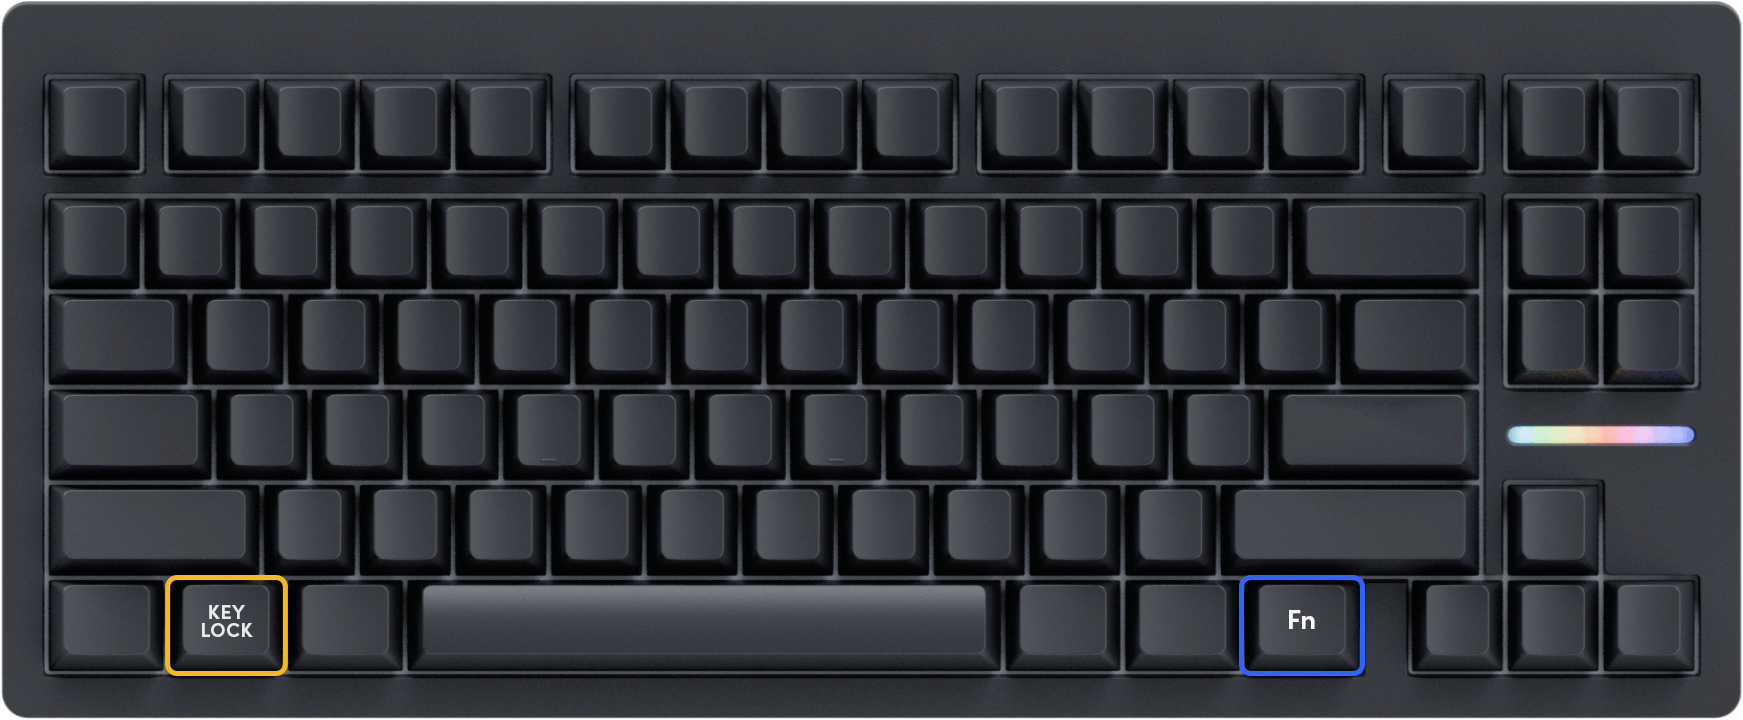
To disable or re-enable the left Windows key, also known a "gamer mode", you can lock the left windows key.
First hold down FN key then press Left-Windows
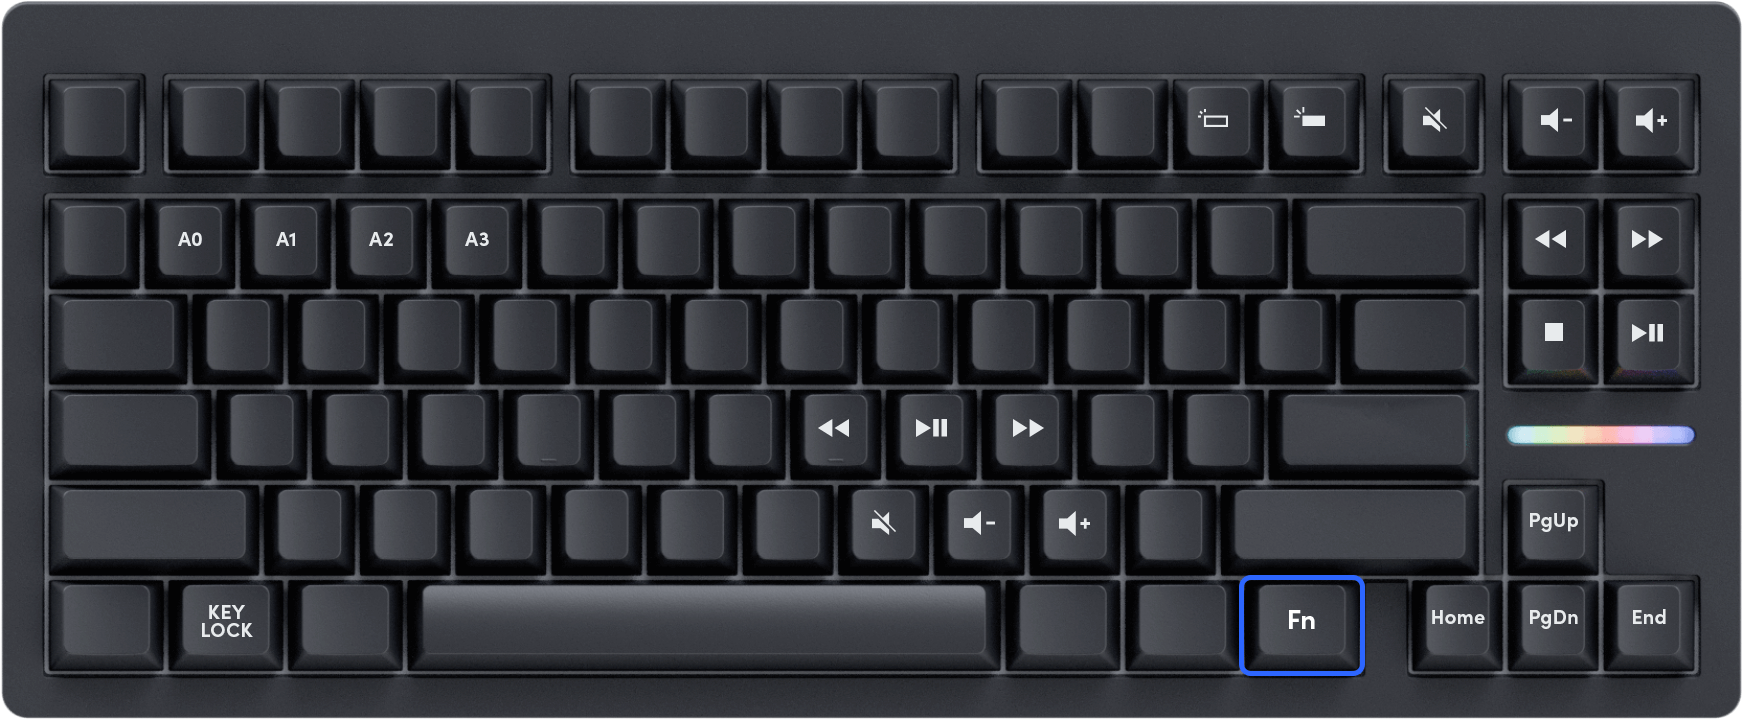
These are the default shortcuts you can use when holding down the FN key.
You can add, remove or change shortcuts by ‘remapping’ them in the Wootility.
Need help?
You don't need to figure out the world by yourself.
You can get help within the Wooting community on Discord (or help others). Otherwise, you can always reach out to us directly. Happy to help.
